Play the video to see a demo of the instructions below.
About CILogon
CloudBank uses the CILogon system. You can authenticate to the portal using a valid username and account for any of the supported list of identity providers. Authentication mechanisms for some providers, including ACCESS CI (XSEDE) and UCSD are shown below. You can log onto the CloudBank portal using your CILogon credentials from many different institutions.
General Login Instructions
Go to: https://www.cloudbank.org/user/login
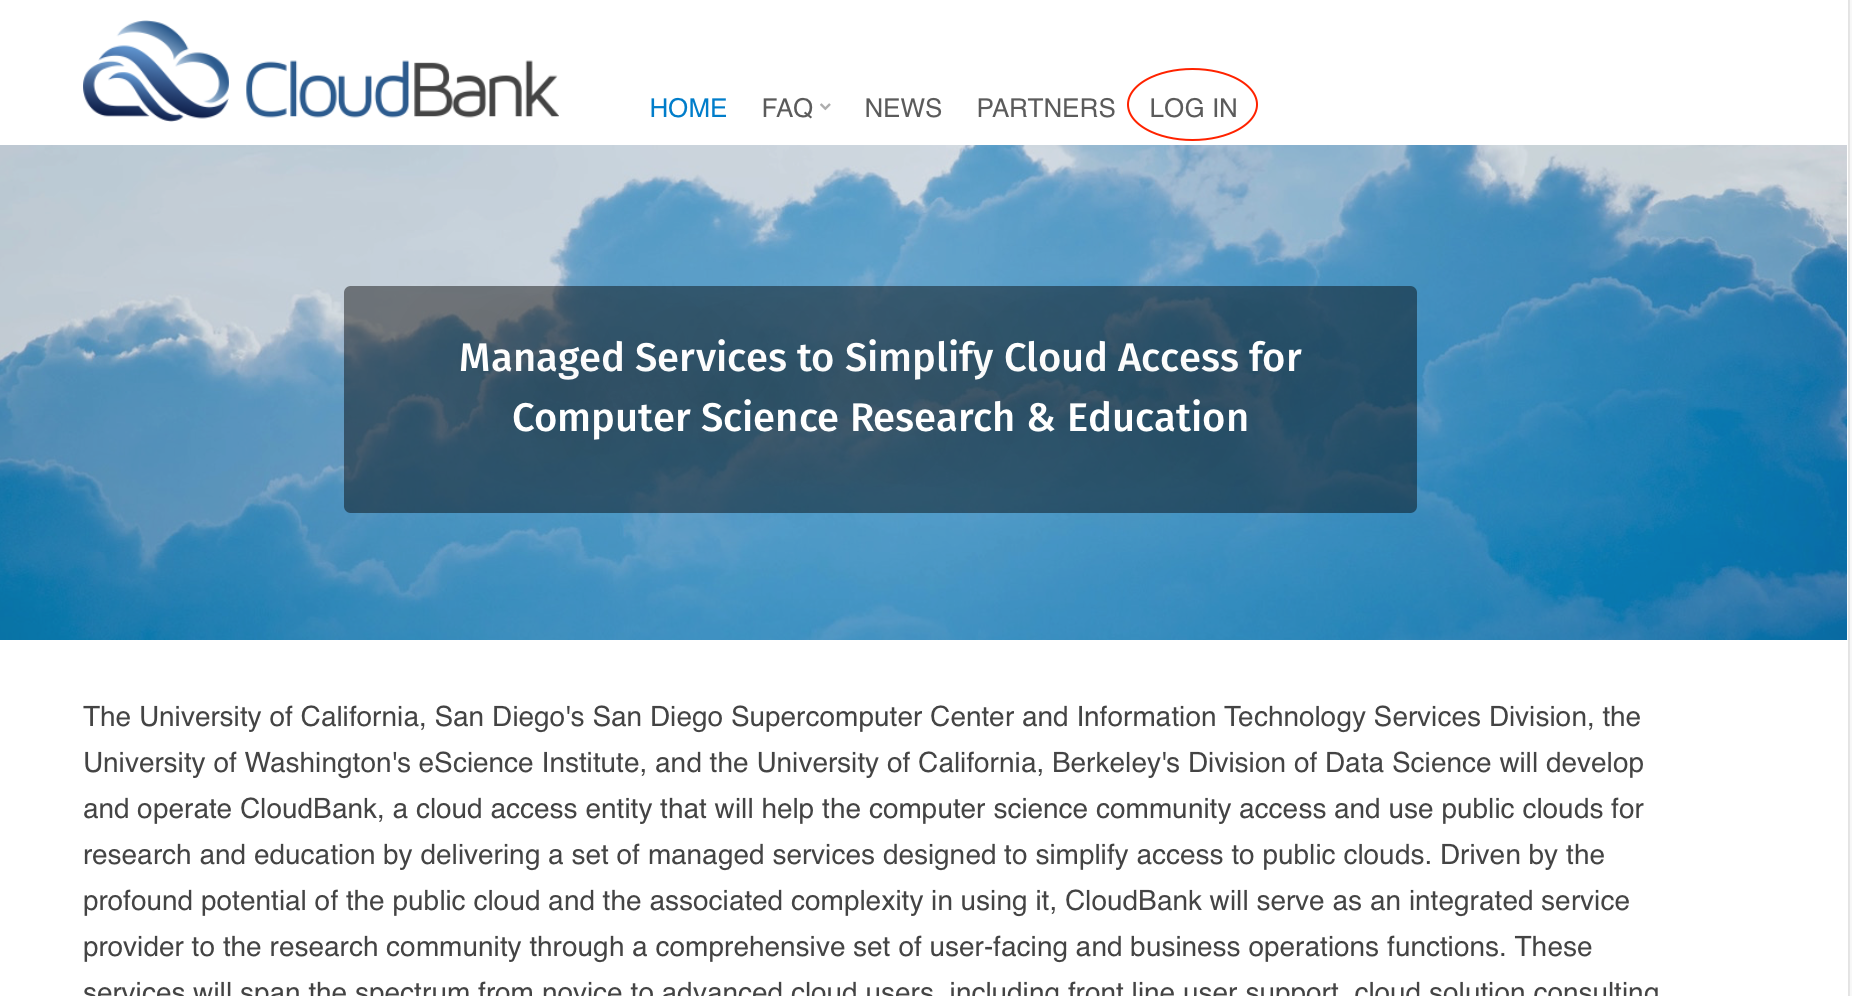
Click the "LOG IN" button on the right side of the top navigation menu.
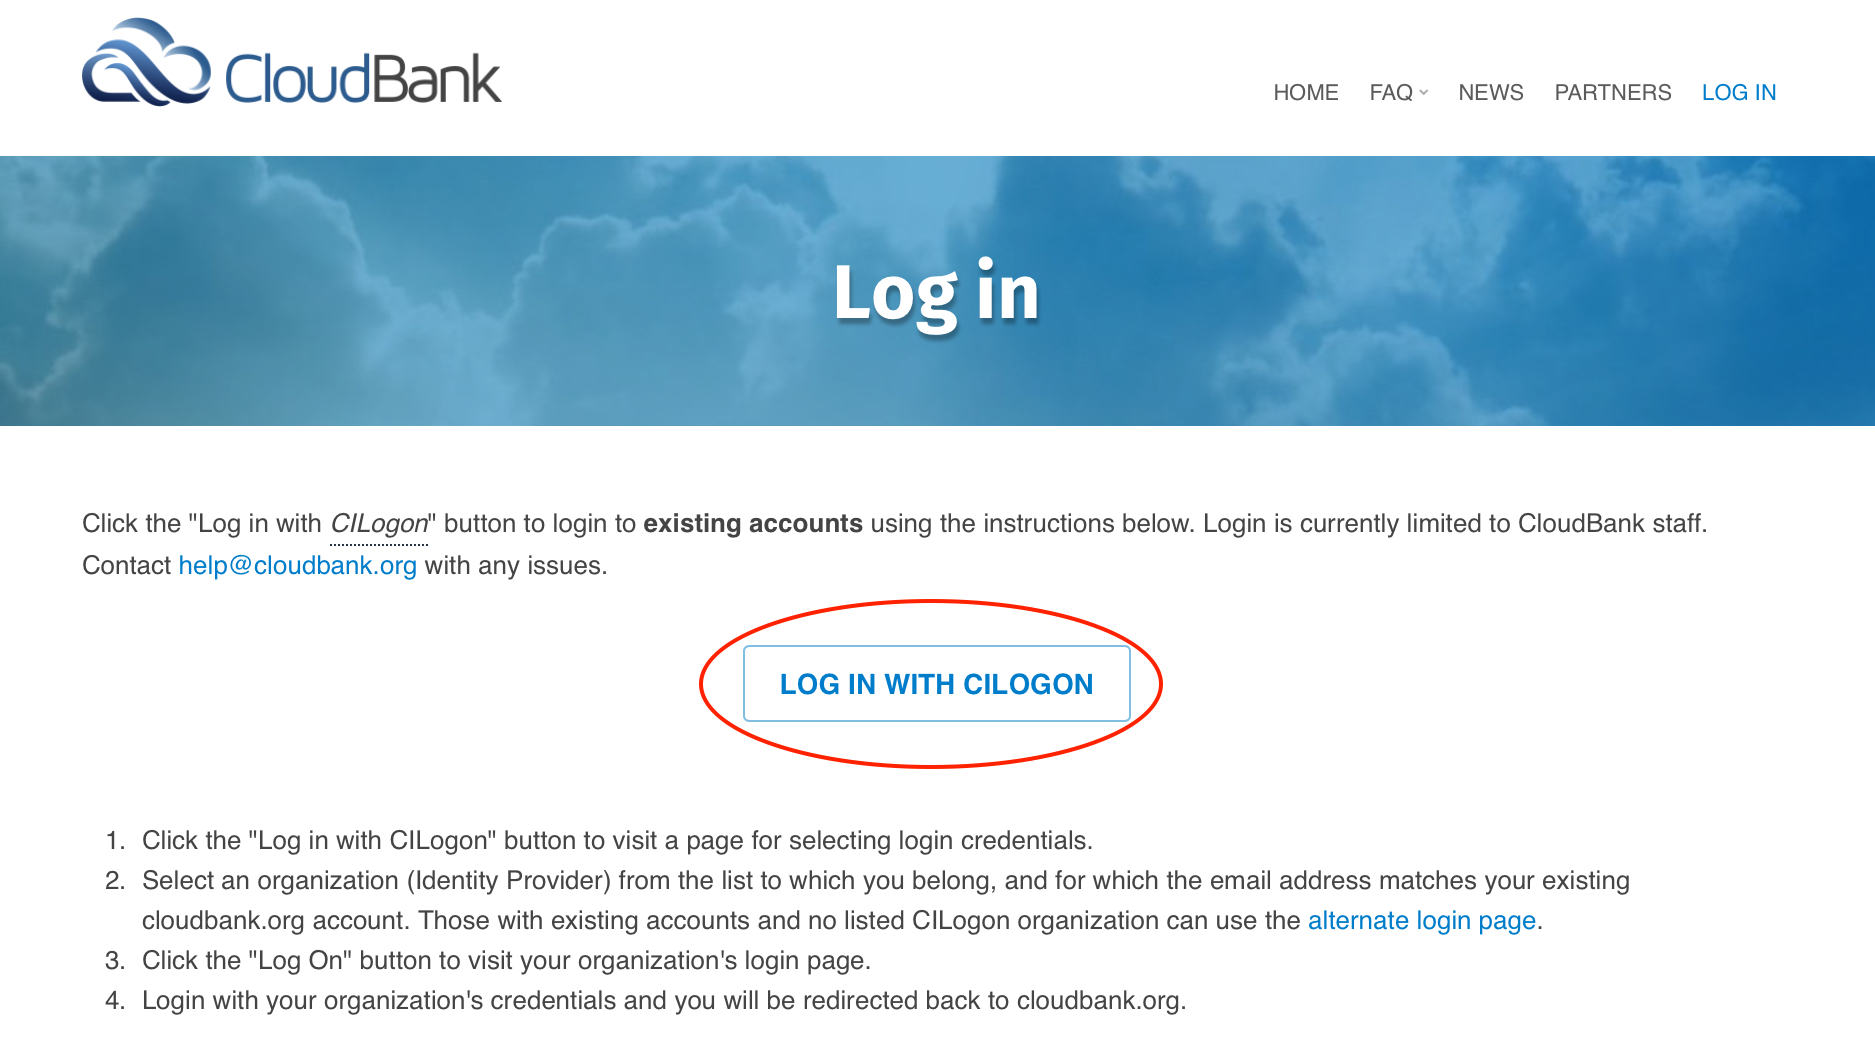
Click the "LOG IN WITH CILOGON" button to visit a page which contains a list of Identity Providers.
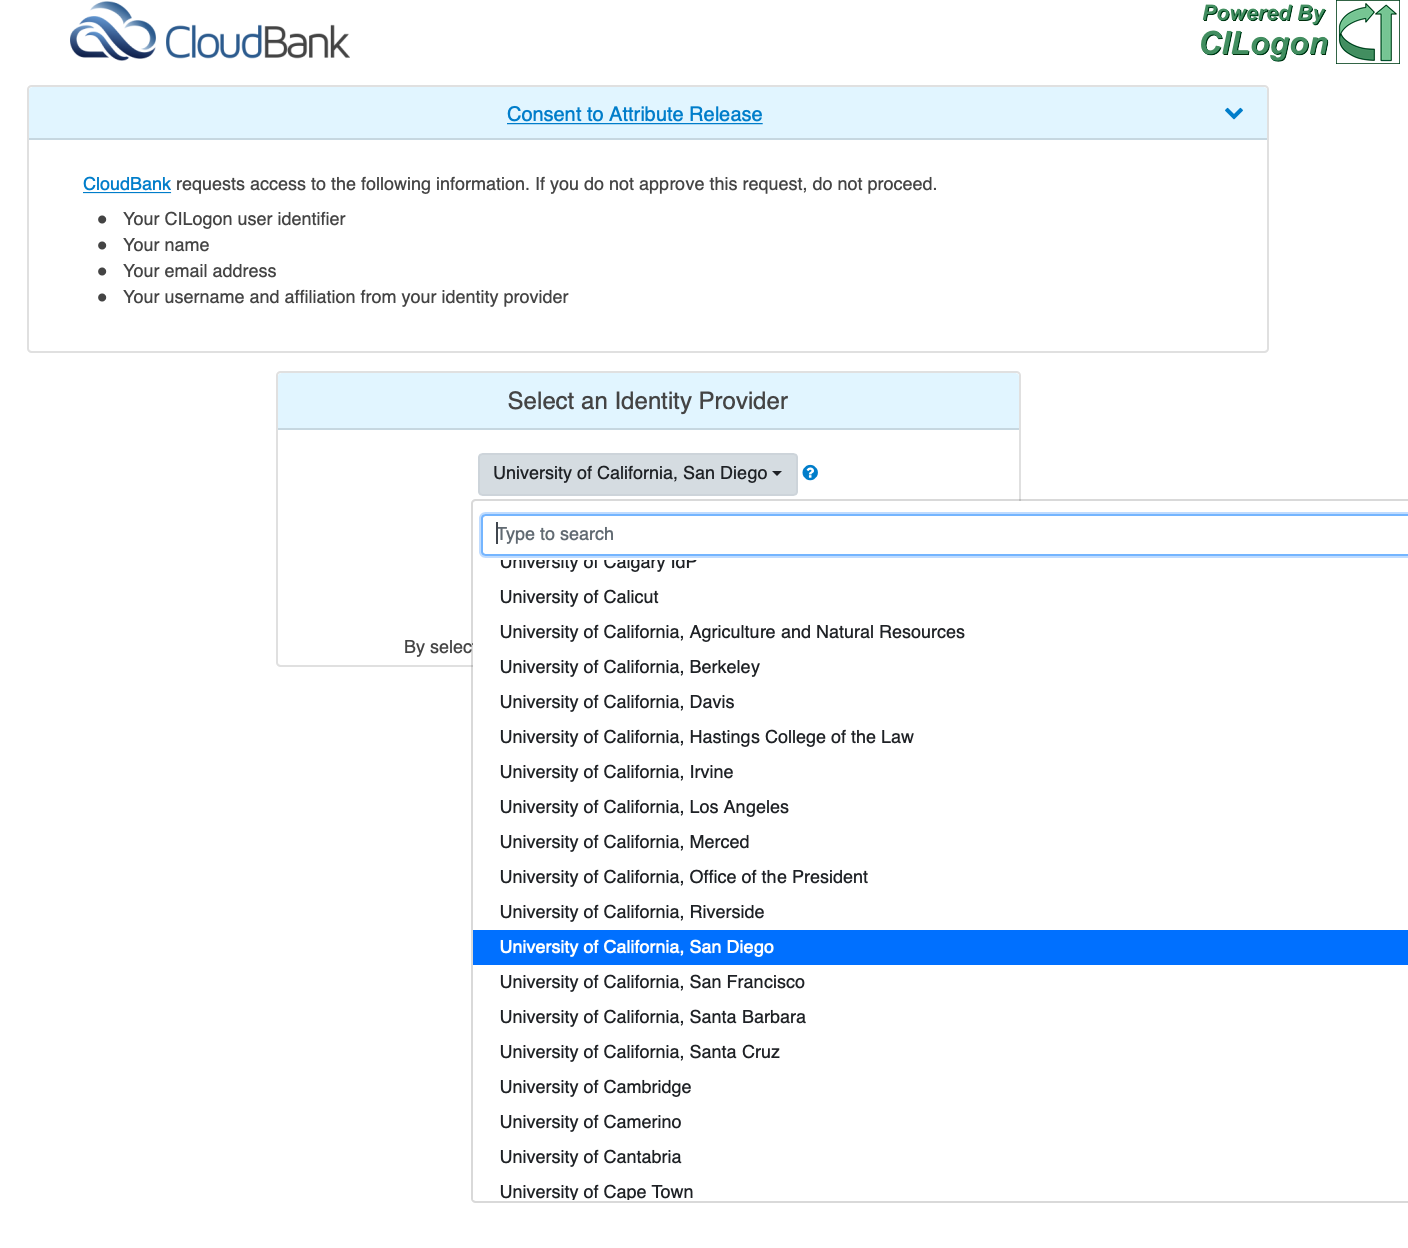
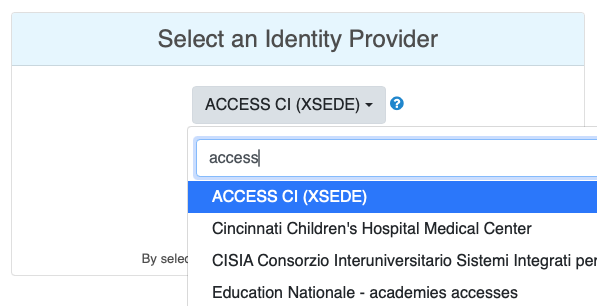
Select an organization (Identity Provider) from the list to which you belong, and for which the email address matches your existing cloudbank.org account.
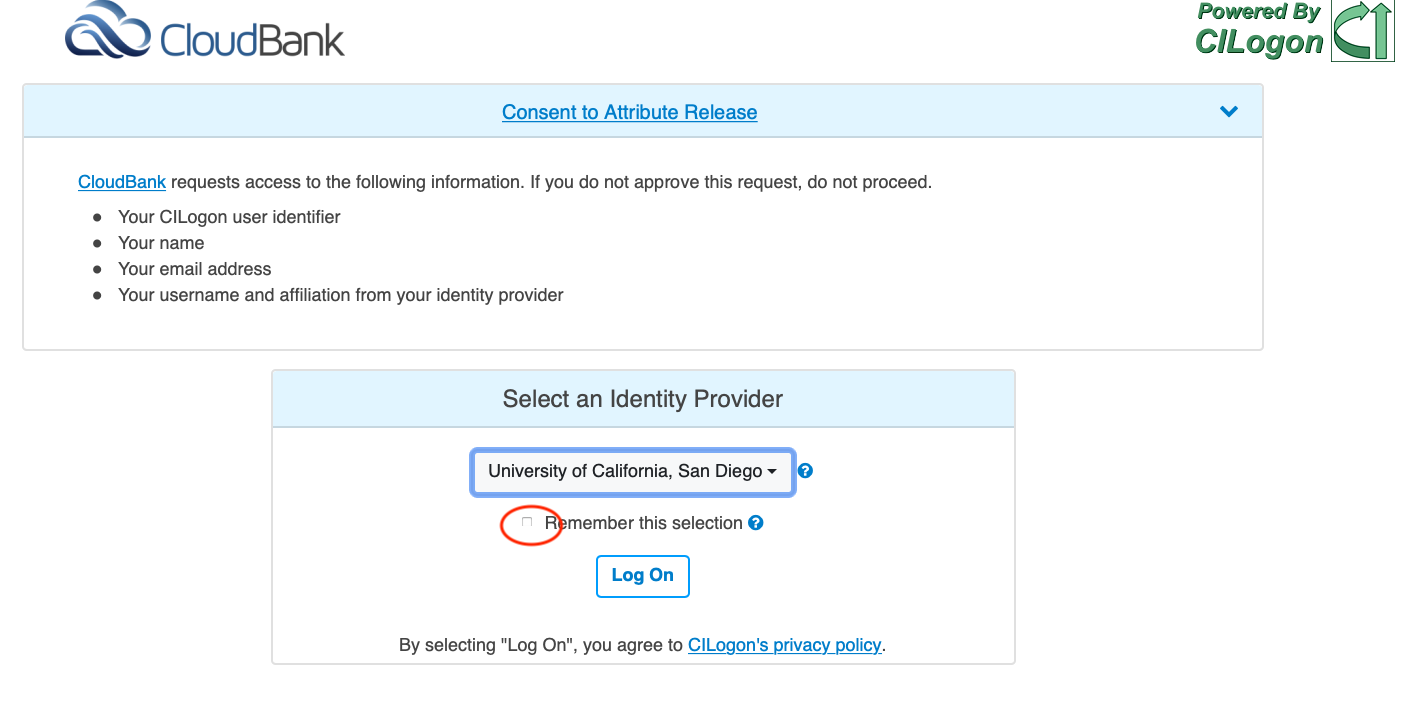
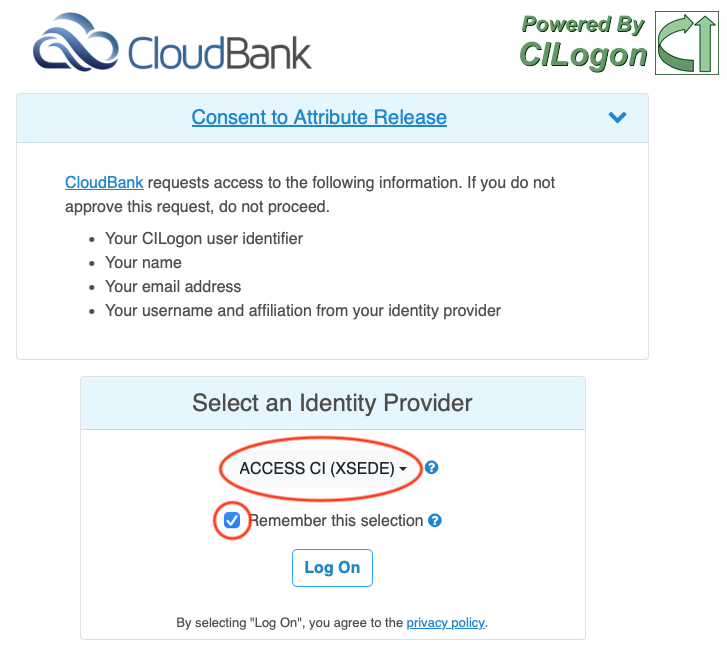
Note: If you will only be using one organization (most users), select the "Remember this Selection" button and it will skip this screen in the future and go directly to your Identity Provider login screen. If there is a chance you will be using multiple Identity Providers, leave this box unchecked. The system will also remember your last choice and display it to you the next time you login. If you ever need to reset your Identity Provider, search and remove the “cilogon.org” cookies from your browser (e.g., in Chrome, go to Preferences -> Site Settings -> Cookies and site data -> See all cookies and site data).
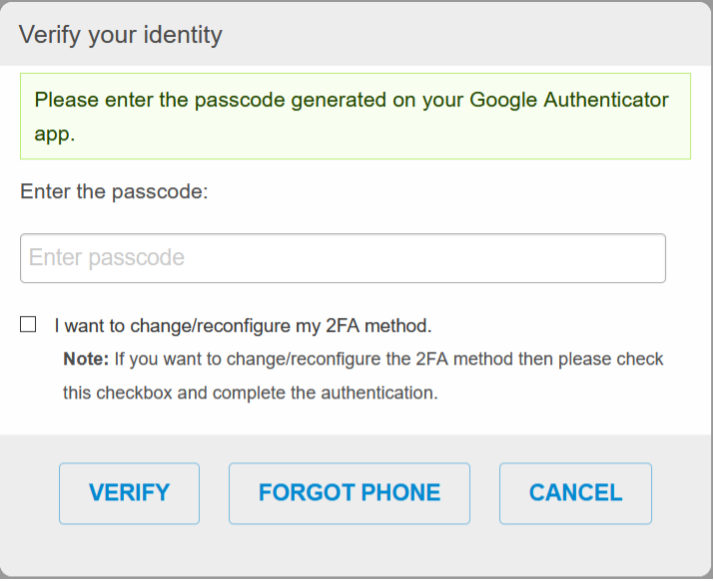
Note that the CloudBank User Portal requires Multi-Factor Authentication (MFA) to login. You may be prompted to set up MFA on your account the first time you login if we are unable to detect that you already used MFA from your Identity Provider (IdP). We are able to detect that MFA was used upon login if your organization’s IdP follows the REFEDS MFA standard. We are also able to establish IdP wide exceptions if MFA is a requirement for your organization but it does not follow the REFEDS MFA standard. If you are prompted to setup MFA on your account, you can choose between different authenticator apps or email option. Subsequently, each time you login thereafter, you will see a window like below.
Log On Using ACCESS CI (XSEDE) Two-Step Login
ACCESS also requires a "Two-Step" login process using the Duo Multifactor Authentication process. For more details on setting up MFA for ACCESS, see their Manage Multi-Factor Authentication page.
Select ACCESS CI (XSEDE) from the list of available Identity Providers on the IP listing page:
Click the drop-down menu to choose the ACCESS CI (XSEDE) Identity Provider. If only using one organization, select the "Remember this selection" button. Then click the "Log On" button to visit the ACCESS portal login page:
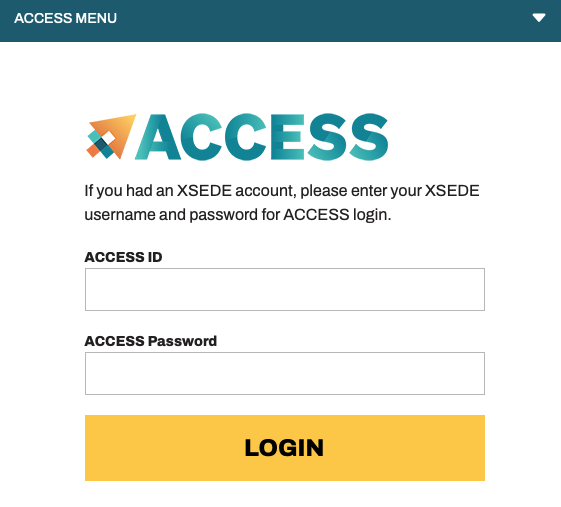
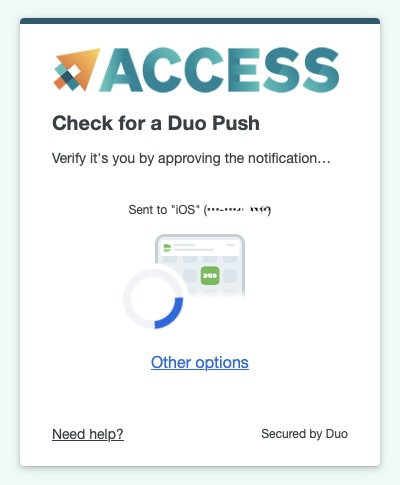
Enter your ACCESS Portal user name and password, and click the "Login" button. If you have been successfully authenticated you will be redirected to a second authentication step using the Duo application:
Use the Duo application to complete the authentication process:
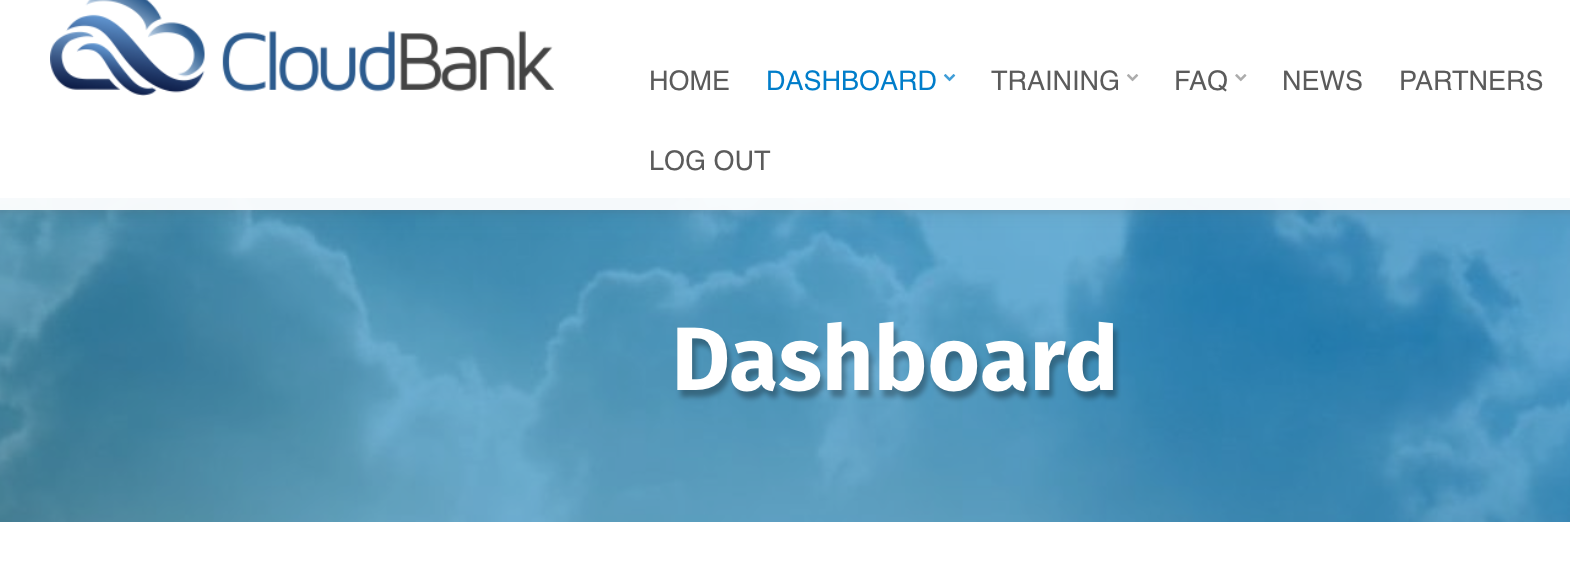
If the authentication is successful, you will be redirected to the secure CloudBank Dashboard page:
Log On Using UCSD Two-Step Login Process
UCSD requires a "Two-Step" login process, which is based on using the Duo Multifactor Authentication application that runs on your mobile or laptop device. For details, see: https://blink.ucsd.edu/technology/security/services/two-step-login/index.html.
From the Identity Provider menu (see above), select "University of California at San Diego". Click the "Log On" button to visit the UCSD Active Directory sign-in page.
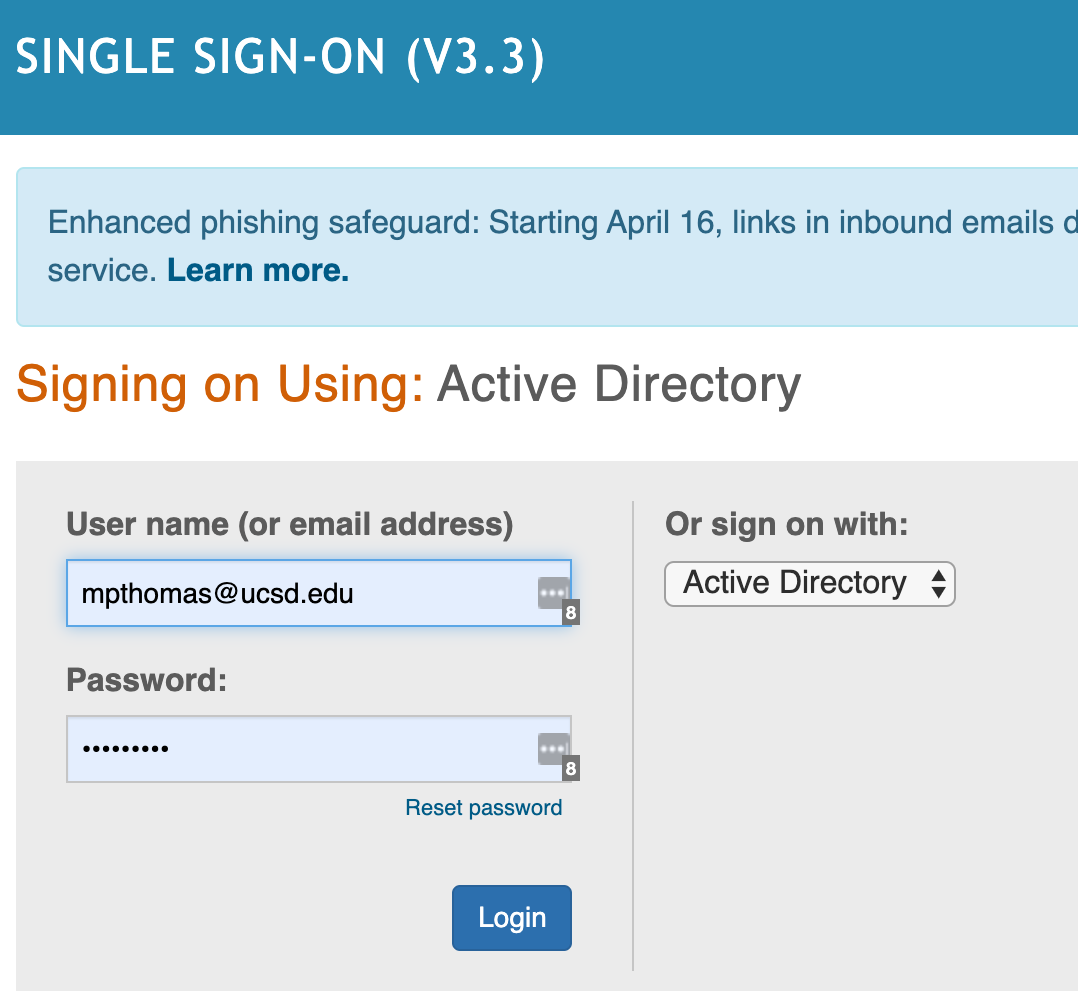
Enter your UCSD Active Directory user name and password, and click the blue Login button. If you have been successfully authenticated you will be redirected to a second authentication step using the Duo application.
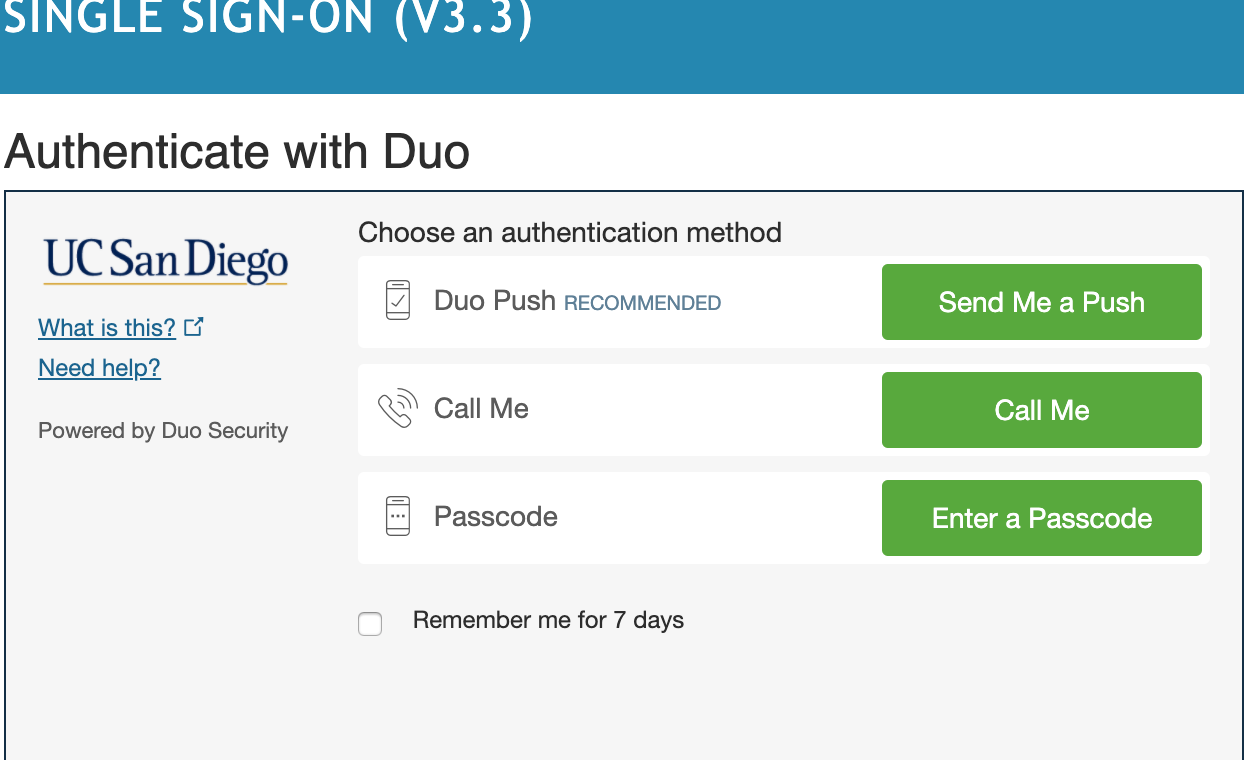
Select the authentication method that you wish to use with the Duo application and complete the authentication process.
If the authentication is successful, you will be redirected to the secure CloudBank Dashboard page, as shown above.
Log on Using ORCID Login Process
ORCID is an independent non-profit effort to provide an open registry of unique researcher identifiers and open services to link research activities and organizations to these identifiers. If you do not have a home identity provider that works with CILogon, you can register for an ORCID id (if they haven't already) for use with CILogon and many other ORCID-enabled systems. To use ORCID as your identity provider for the CloudBank portal, you will need to 1) make your email public the first time you login to the CloudBank portal and 2) configure two-factor authentication.
Make your email public on your ORCID profile: The email on your ORCID profile needs to be made public in order to make a link to your cloudbank.org portal account and can then be removed after a successful login. To make your email public, please login to ORCID and use the following steps to make your email address public:
- Click on your name in the top right-hand corner and then choose "View my ORCID record".
- Under Emails in the left hand column, you will see your email listed. If you have a green dot next to your email, that means it is public and CloudBank will be able to see it when you login for the first time.
- If you have a red or orange dot next to your email, click the pencil icon and click the "everyone" icon (you may need to hover over it to see the word 'everyone') and click the "Save changes" button. You can change it back after you login into the CloudBank portal successfully.
Turn on two-factor authentication: Two-factor authentication is required to log into the CloudBank portal. To configure two-factor authentication in ORCID, please login to ORCID and use the following steps to configure two-factor authentication:
- Click on your name in the upper right corner of the ORCID screen and select "Account settings" from the menu.
- Click on "Two-factor authentication" under the Security section.
- Click the "Turn on two-factor authentication" button and follow the screens (click here for the ORCID documentation).
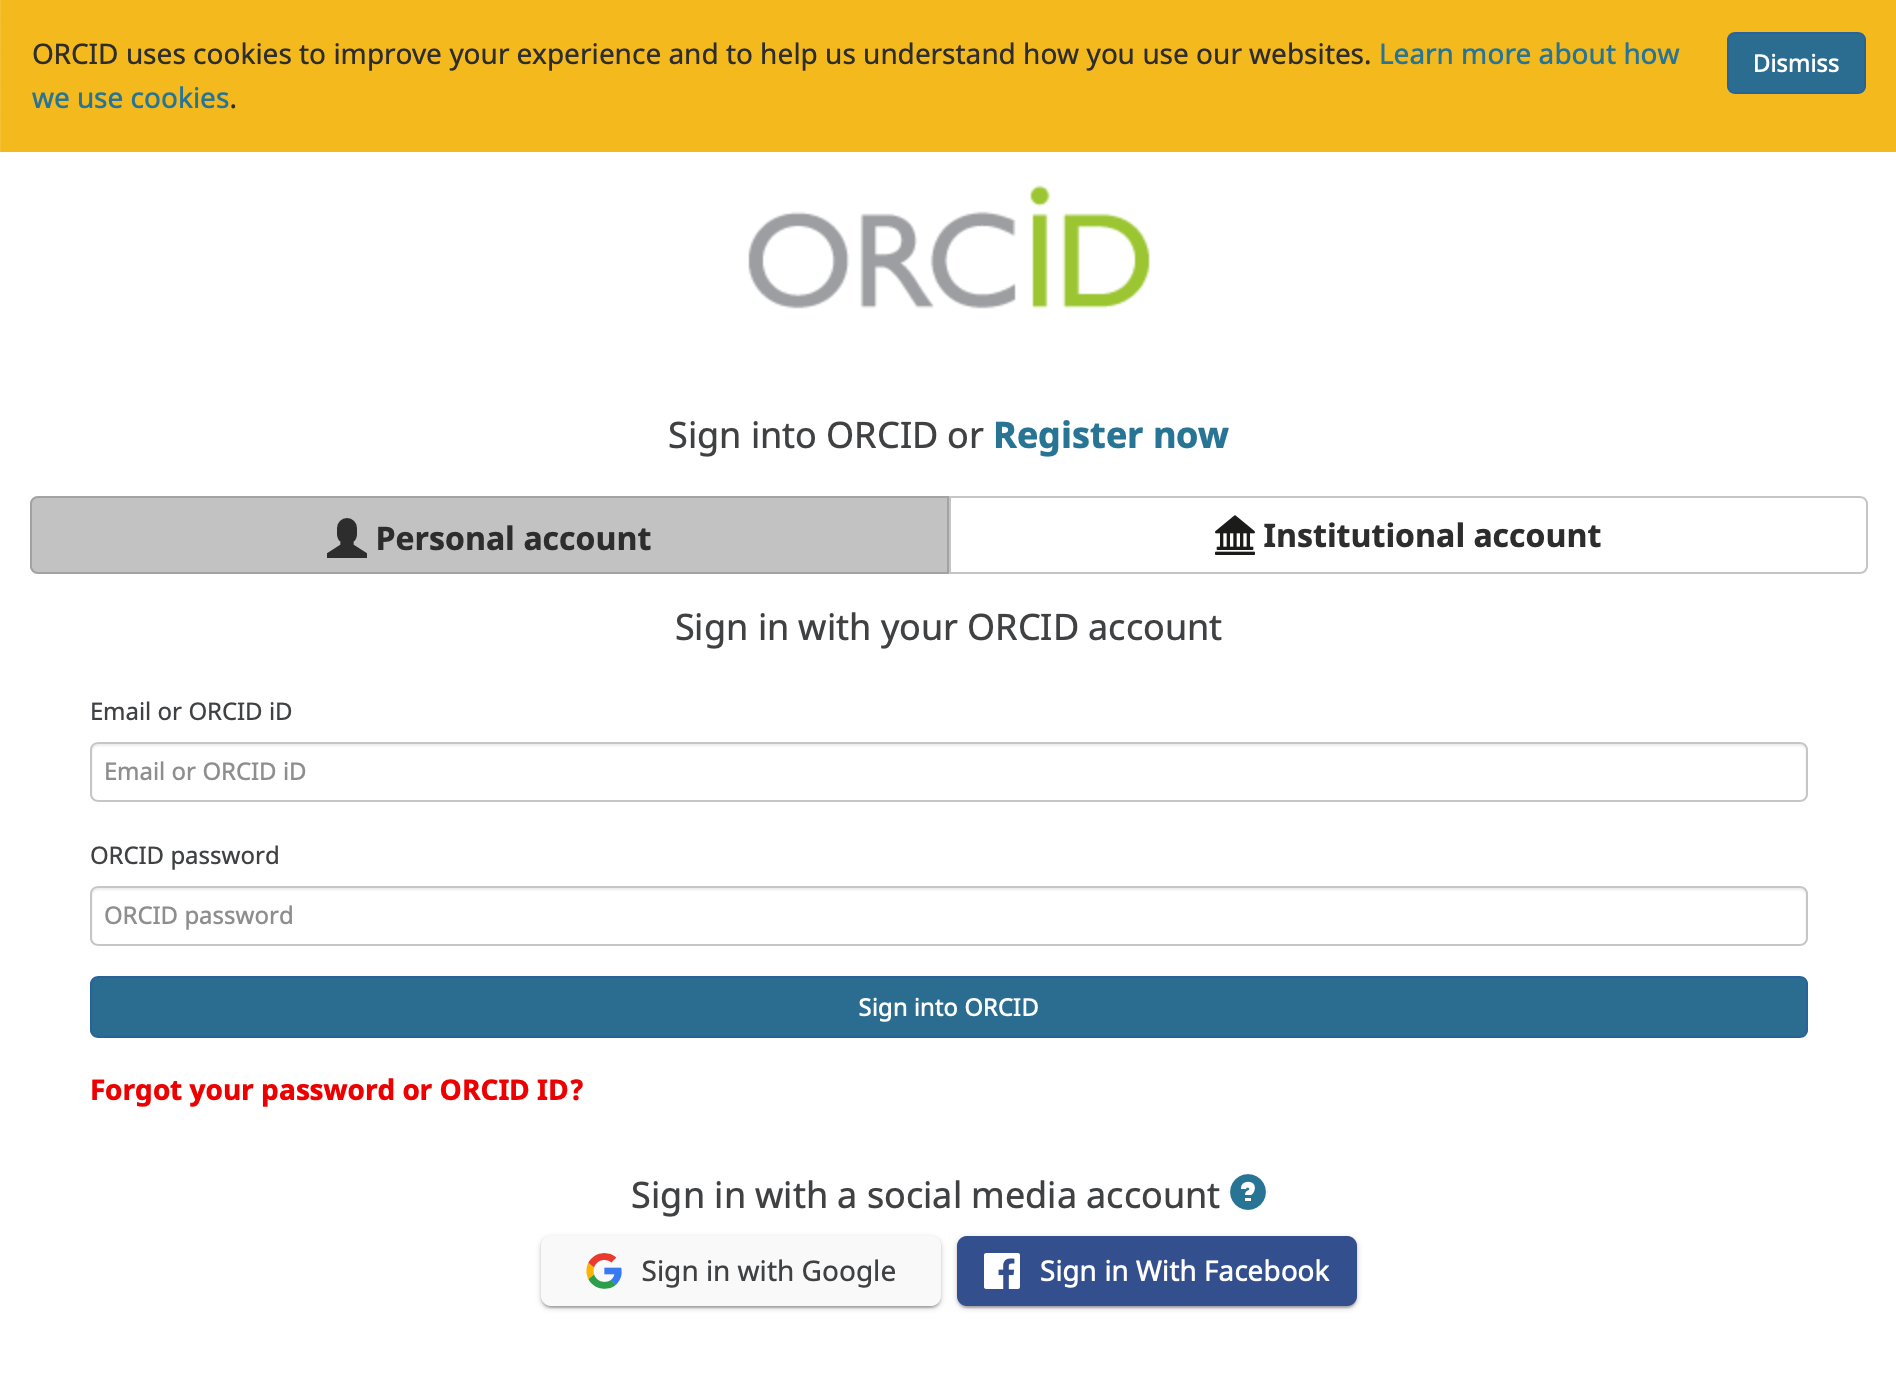
Back on the CloudBank portal, from the Identity Provider menu (see General Login Instructions above), Select ORCID from the list of available Identity Providers on the IP listing page.

You will see the ORCID in the [Selection menu]. Click the drop-down menu to choose the ORCID Identity Provider:

Click the "Log On" button to visit the ORCID sign-in page.
After you login successfully, your ORCID profile is now linked to our CloudBank portal and you can make your email private again by returning to the ORCID portal and undoing the steps above in your "Account Settings".
Two Factor Authentication (2FA)
CloudBank requires 2FA for all accounts. If you believe that you already have 2FA and receive the message to add it through the CloudBank portal, please email help@cloudbank.org. If your CILogon account doesn't already have 2FA, you will be prompted to configure a 2FA method on your first login as shown below.
Choose your preferred authentication method and follow the instructions to login: 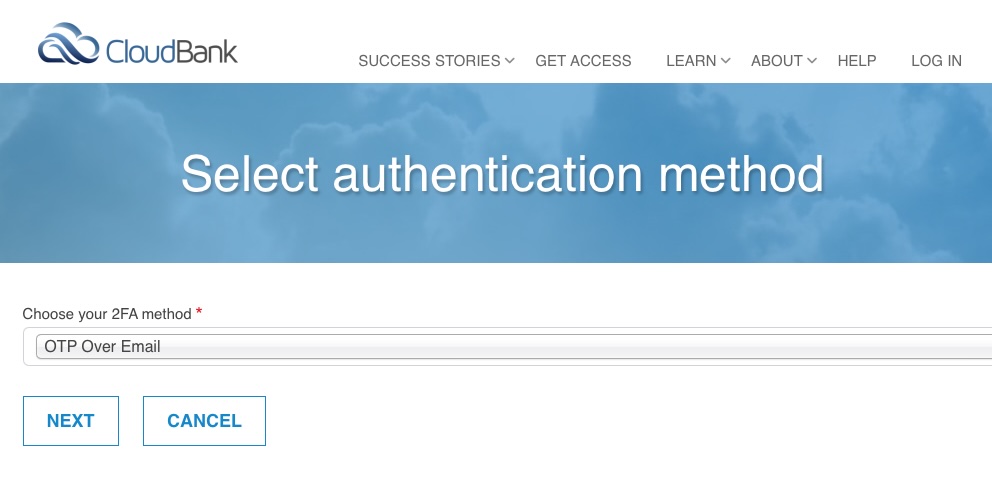
If you would like to change your 2FA method later, you can do so as follows:
1) Click "My Account" from the navigation to view your account profile
2) Click the "2FA Configurations" tab on your account profile and then click the "Reconfigure" link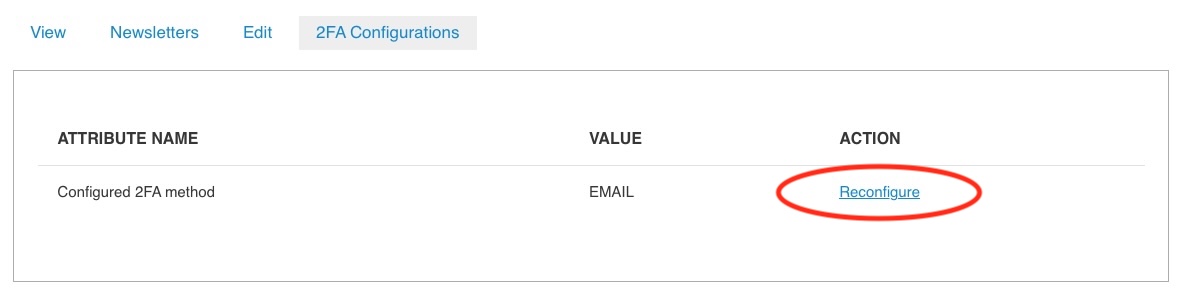
3) Click the "Confirm" button to be logged out - you can then configure a new 2FA method on next login
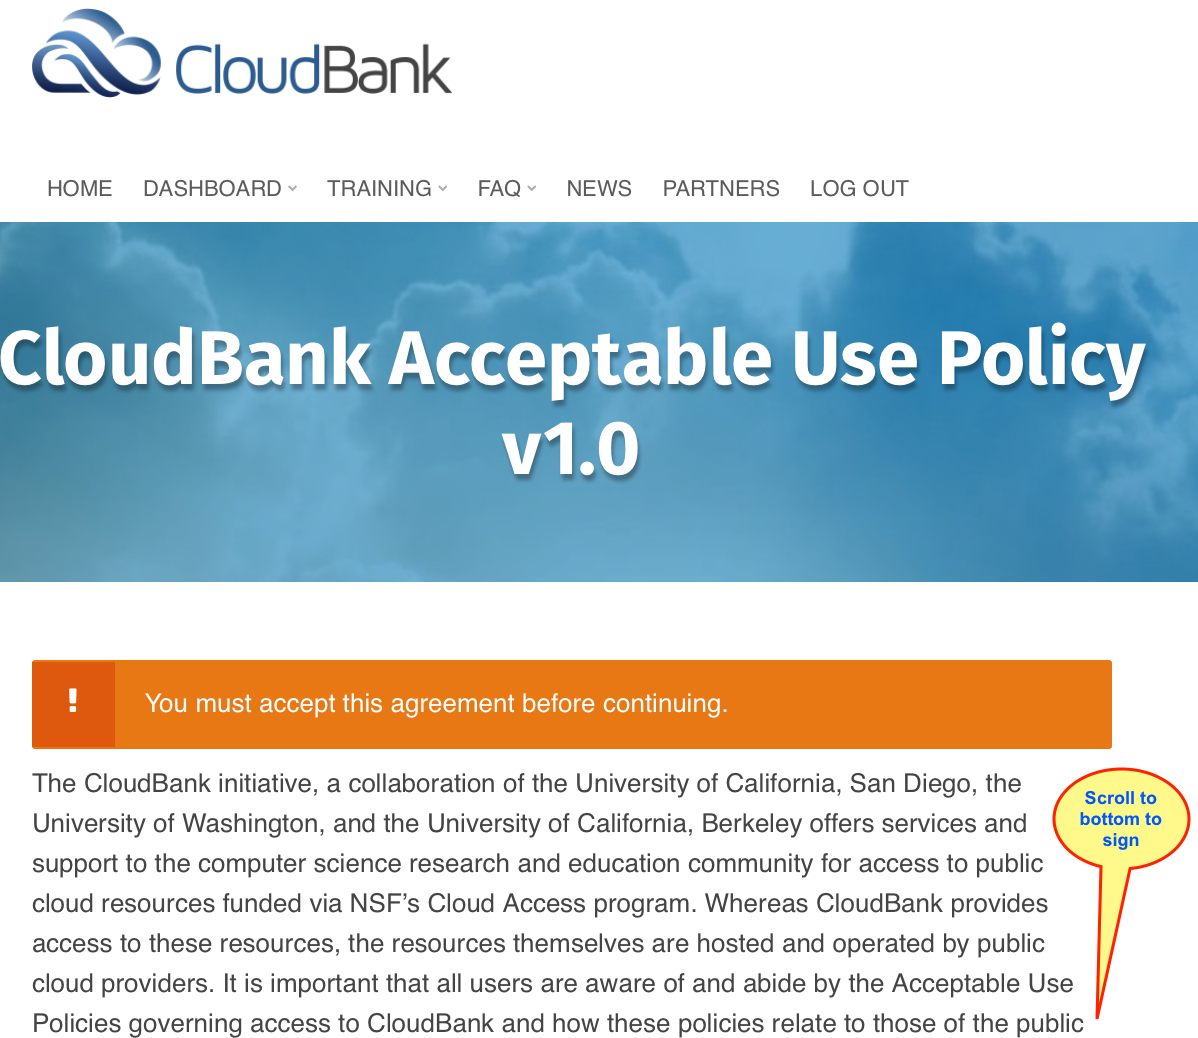
View and accept the Acceptable User Policy
Once you have been authorized by your identity provider, Login with your organization's credentials and you will be redirected back to cloudbank.org.
Upon login, view and accept the AUP.
Ensure you get CloudBank emails
Please whitelist the portal email account cloudbank-www@ucsd.edu to ensure you get important updates and notifications.
What's next?
Accessing Cloud Billing Accounts
View the Cloud accounts that you have access to, balances, and log into Cloud web consoles.
Managing Funds and Billing Accounts
View CloudBank funds and manage users on Cloud Billing Accounts.
